Special Assessments Adjustment List Page
The Special Assessments Adjustment List page allows users to perform transaction adjustments at the parcel level for previously posted transactions. In this section you may reverse billing, payment, fee, penalty, and adjustment transactions, apply a fee, adjust customer undesignated balances, and refund customer undesignated balances.
- On the Special Assessments District Adjustment List click New.
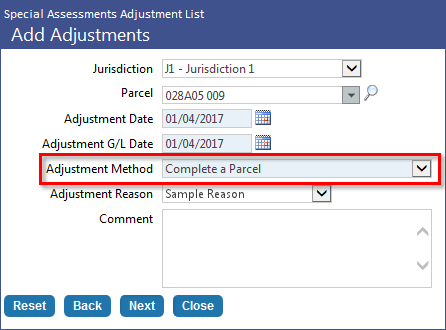
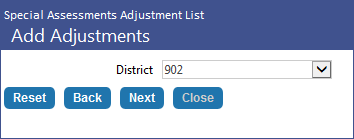
- The Add Adjustments page will be displayed.
- Select the Jurisdiction of the parcel you would like to adjust. This field is required. Once selected, the Parcel drop-down below will be populated with relevant results.
- Select the Parcel for which you would like to create a billing adjustment. This field is required. The Parcel drop-down list includes only those parcels that are NOT completed. Clicking the Advanced Search icon will open the Parcel Prompt pop-up. This screen contains various fields to assist you in locating the parcel to be selected. Click Search to locate a parcel, then click the parcel hyperlink to close the pop-up and add it to the Parcel field.
- Enter an Adjustment Date. By default it is set to the current date. This is a required field.
- Enter an Adjustment G/L Date. By default it is set to the current date. This is a required field.
-
Select an Adjustment Method to be performed. This field is required. You may choose from the following selections:
- Reverse a Transaction - used for any transaction that needs to be reversed out. This would be used in situations where the wrong bill was sent out to the customer or needs adjusting.
- Apply a Fee - used to apply one of the fees (set up in the Maintain Fees section) to a customer's assessment.
- Adjust Customer Undesignated Balance - this would be used for customers when they have paid a lump sum amount but their bills have not yet been created. If selected, the Parcel field becomes required.
- Refund Customer Undesignated Balance - this would be used to refund customers who have a remainder left after all bills have been paid. If selected, the Parcel field becomes required.
- Complete a Parcel - This option allows users to complete a parcel through an adjustment.
- Add a Parcel to a Dynamic/External District - Allows users to add a parcel to a dynamic or external district.
- Select an Adjustment Reason. This field is optional and populated from Validation Set #535.
- Enter a Comment for the adjustment. This field is optional.
-
Click Next to continue to the next page. The page shown depends on the selection made in the Adjustment Method field. Follow the links below for the appropriate next steps.
Reversing a Transaction
Apply a Fee
Adjusting a Customer Undesignated Balance
Refunding a Customer Undesignated Balance
Completing a Parcel
Adding a Parcel to a Dynamic District
This page contains filters to assist in locating the transaction item you would like to adjust.
- Select the District.
- Select the date range the transaction would have fallen within by making selections in the From Date and To Date fields.
- Select the Transaction Type to be adjusted. This field is required. You may choose from Billing, Payment, District Adjustment, Billing Adjustment, Payment Adjustment, Undesignated Adjustment, Penalty, Overpayment to Unbilled Principal, Penalty Adjustment, or Undesignated Payment to Bill.
- Select Invoice or Receipt.
- Click Next.
- The Special Assessments Add Adjustment - Reverse Transactions page will be displayed. The grid will be populated with results generated from the previous filter page.
- Select the transaction(s) to be adjusted by clicking the check box in the grid. To select all rows, click the master check box located in the grid header.
-
Click Finish. The adjustment will be added to the grid on the Special Assessments Adjustment List page.
Note: When a payment transaction that completes a parcel gets reversed through adjustments, the status of the completed parcel is changed to Active. At that point, the user will not be able to select any adjustment transaction for reversal or select any other bill than the latest bill for reversal.
- Select a District. This field is required.
- Click Next.
- Select the Fee you would like to apply from the drop-down. The drop-down shows any fees that were set up on the Maintain Fees page. A selection in this field is required.
- If needed, you may also adjust the Quantity and/or Amount for the fee being charged.
- Click Finish to create the fee adjustment to the customer's assessment.
- Select a District from the drop-down. This field is required.
- Click Next. The software will check for any undesignated balances based on the criteria selected. If there is an undesignated amount, the Special Assessments Add Adjustment - Adjust Customer Undesignated Balances screen will be displayed.
- The Adjusted field defaults to the undesignated amount balance. This amount can be modified if necessary but it cannot exceed the total undesignated balance.
- Click Finish.
Note: Only one adjustment is allowed per parcel, per district.
- Select a District from the drop-down. This field is required.
- Select a Bank Account from the drop-down. This field is required.
- Click Next. The Adjust Customer Undesignated Balances page will be displayed. By default, the full amount of the undesignated balances will be displayed in the Refund field. You may choose to refund any amount up to the full undesignated balance.
- Click Finish.
- Click to select the adjustment to be deleted in the grid.
- Click Delete.
- A pop-up will be displayed asking you to confirm the deletion. Click OK.
To create a refund of a customer's undesignated balance, create the payment register and print checks for the associated refund once a created undesignated adjustment has been validated and approved, follow the steps below.
- Select the undesignated balance adjustment in the grid and click the Create Refund icon located at the bottom of the grid.

- The create Refund Payment Register pop-up will be displayed.
- The default Bank Account from which the check will be issued will be displayed in the drop-down. If other bank accounts are available, they will be displayed for selection. This field is required.
- The Starting Check Number field displays the default check number that will be assigned. The system tracks check numbers and assigns them automatically. Another check number can be entered if necessary.
- Check Date is defaulted to the current date but can be changed if necessary. This field is required.
- Click Create. If successful, the Payment Batch Register will be sent to myReports.
Note: If an open payment batch for the adjustment already exists, an error message will be displayed. Only one payment batch for the bank account may be in process at once.
- Once the created refund adjustment has been validated and approved (refer to the workflow steps below), the check can be printed from the Payment Batch List (navigate to Financial Management > Payment Processing > Payment Batches).
- When printing refund checks from the Print Payments dialog, select the Override Check Format check box. This will enable the Format drop-down. In this field, select the echo form that was previously set up for Special Assessments refund checks. Example: SA Refund - Special Assessments Refund Check.
- Once the check has been printed, the adjustment can be posted.
To add an adjustment to Complete a Parcel, do the following:
- Open the Special Assessments Adjustment List page (Financial Management > Special Assessments > Adjustments) and click New
 .
. - The Add Adjustments window #1 will display (see below). Make the necessary entries to add an adjustment and be sure to select Complete a Parcel from the Adjustment Method drop-down list.
After you have made all the necessary entries, click Next.
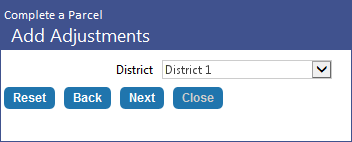
- The Add Adjustments window #2 will display. This page contains a single field, District. From this field's drop-down list, select the district for which the adjustment is being made. The list contains only those active districts that are associated with the parcel selected via the Add Adjustments window #1 page (see above).
Click Next.
- The Complete a Parcel page will display. This page displays the adjustment and all the essential related information for completing the parcel, such as the parcel number, legal description, owner's name, unbilled principal and interest, account fees, and all associated balances.
The system will then check for any unposted activity on the selected district. This includes unposted activities related to Special Assessment billing, adjustments, delinquent batches, and revenue collection receipts for Special Assessment payments.
If any district-related unposted activity is discovered, an error message will display to inform the user that the parcel cannot be completed due to there being one or more unposted activities associated with the district. The user will be able to complete a parcel only when there is no unposted activities tied to the district.
If no such activity is detected, the wizard will advance to the next step.
At this point, the adjustment is not yet finalized, so if after reviewing the information you discover that changes are required, click the Back button to return to a previous page in the wizard and make the necessary changes.
If/when the adjustment looks correct, click the Finish button.

The user will be returned to the Special Assessments Adjustment List page, where the new adjustment will be added to the grid.
Note: At this point, the adjustment can be validated. On validation, a reversal will occur for each individual transaction associated with the parcel (as specified in the district) so the balances zero out. Any undesignated balance will remain on the account as an undesignated balance. Reversal journal transactions will be created for unbilled principal, account fees, billed principal, billed interest, and billed fees. There will be individual journal entries for each transaction. For example, if there are four bills, four fees associated to the parcel, then each of the four bills will be reversed individually. All the balances on the parcel/district will at that point be zero.
To create an adjustment to add a parcel to a dynamic or external district, do the following:
- Open the Special Assessments Adjustment List page (Financial Management > Special Assessments > Adjustments) and click New .
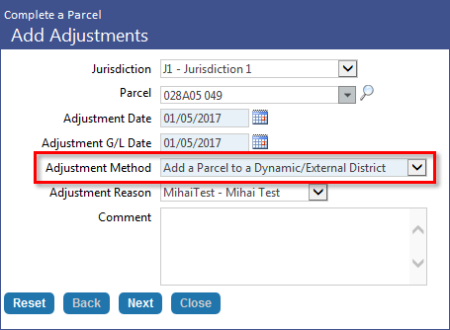
- The Add Adjustments window #1 will display (see below). Make the necessary entries to create an adjustment and be sure to select Add a Parcel to a Dynamic/External District from the Adjustment Method drop-down list.
After you have made all the necessary entries, click Next.
-
The Add Adjustments window #2 will display. This page contains only the District field. The District drop-down list includes all posted and active dynamic and external districts to which a parcel can be added.
Note: Districts for which the selected parcel is in Pending status will not be available for selection, i.e., will not appear in the District drop-down list.
Select the district for which the adjustment will be made and then click Next.
The system will then check for any unposted activity on the selected district. This includes unposted activities related to Special Assessment billing, adjustments, delinquent batches, and revenue collection receipts for Special Assessment payments.
If any district-related unposted activity is discovered, an error message will display to inform the user that the parcel cannot be completed due to there being one or more unposted activities associated with the district. The user will be able to complete a parcel only when there is no unposted activities tied to the district.
If no such activity is detected, the wizard will advance to the next step.
-
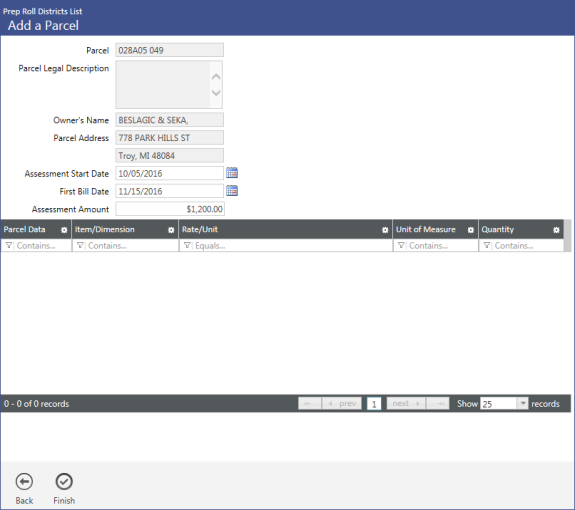
The Add a Parcel window (i.e., page 3 of the wizard) will display. This page displays the essential adjustment information.
The top portion of the page contains general information, such as Parcel code, Parcel Legal Description, Owner's Name, and Parcel Address. These fields are for informational purposes and cannot be edited. The Assessment Start Date, First Bill Due Date, and Assessment Amount fields on the other hand are editable.
What displays on the second half of the page will differ depending on the selected district type.
-
The Special Assessments Adjustment List page will reappear with the new adjustment listed in the grid.
Validation: When the adjustment is validated, the district is updated with the information from the new parcel. An installment schedule for the new parcel will be created for the user to view.
Posting: When the adjustment is posted, the status flag on the parcel is changed to Active and the parcel is then added to the district and viewable in Active Roll Districts, inquiries, and reports.
Note: If an adjustment is deleted, the associated pending parcel will be removed from the selected district.
For dynamic districts, the page will consist of a grid that lists all associated parcel items, if any exist (see above).
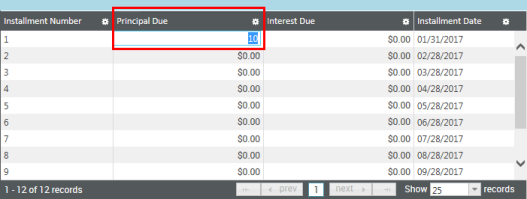
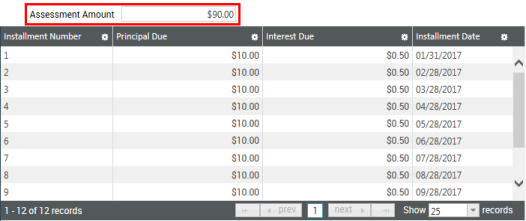
For external districts, the lower portion of the page will consist of the Payment Installments grid, which allows you to define the principal and interest due for each payment installment associated with the parcel-district (see below).
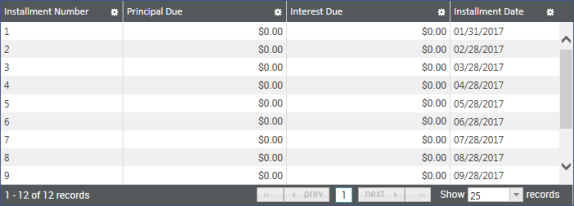
For more information about the Payment Installments grid, click ![]() here.
here.
At this point, the adjustment is not yet finalized, so if upon review you discover the information requires changes, click the Back button to return to a previous page in the wizard and make the necessary changes.
When the adjustment looks correct, click the Finish  button.
See also: